Homemade Veggie Broth

Ever wonder what to do with those well-intentioned veggies that are now past their prime in your fridge?
I got you.
Homemade veggie broth to save the day!
Why make veggie broth when you can buy it at the store? Simple.
Because it is cheaper.
Because it tastes better.
Because it reduces food waste.
Because it gives peace of mind to those with multiple food allergies.
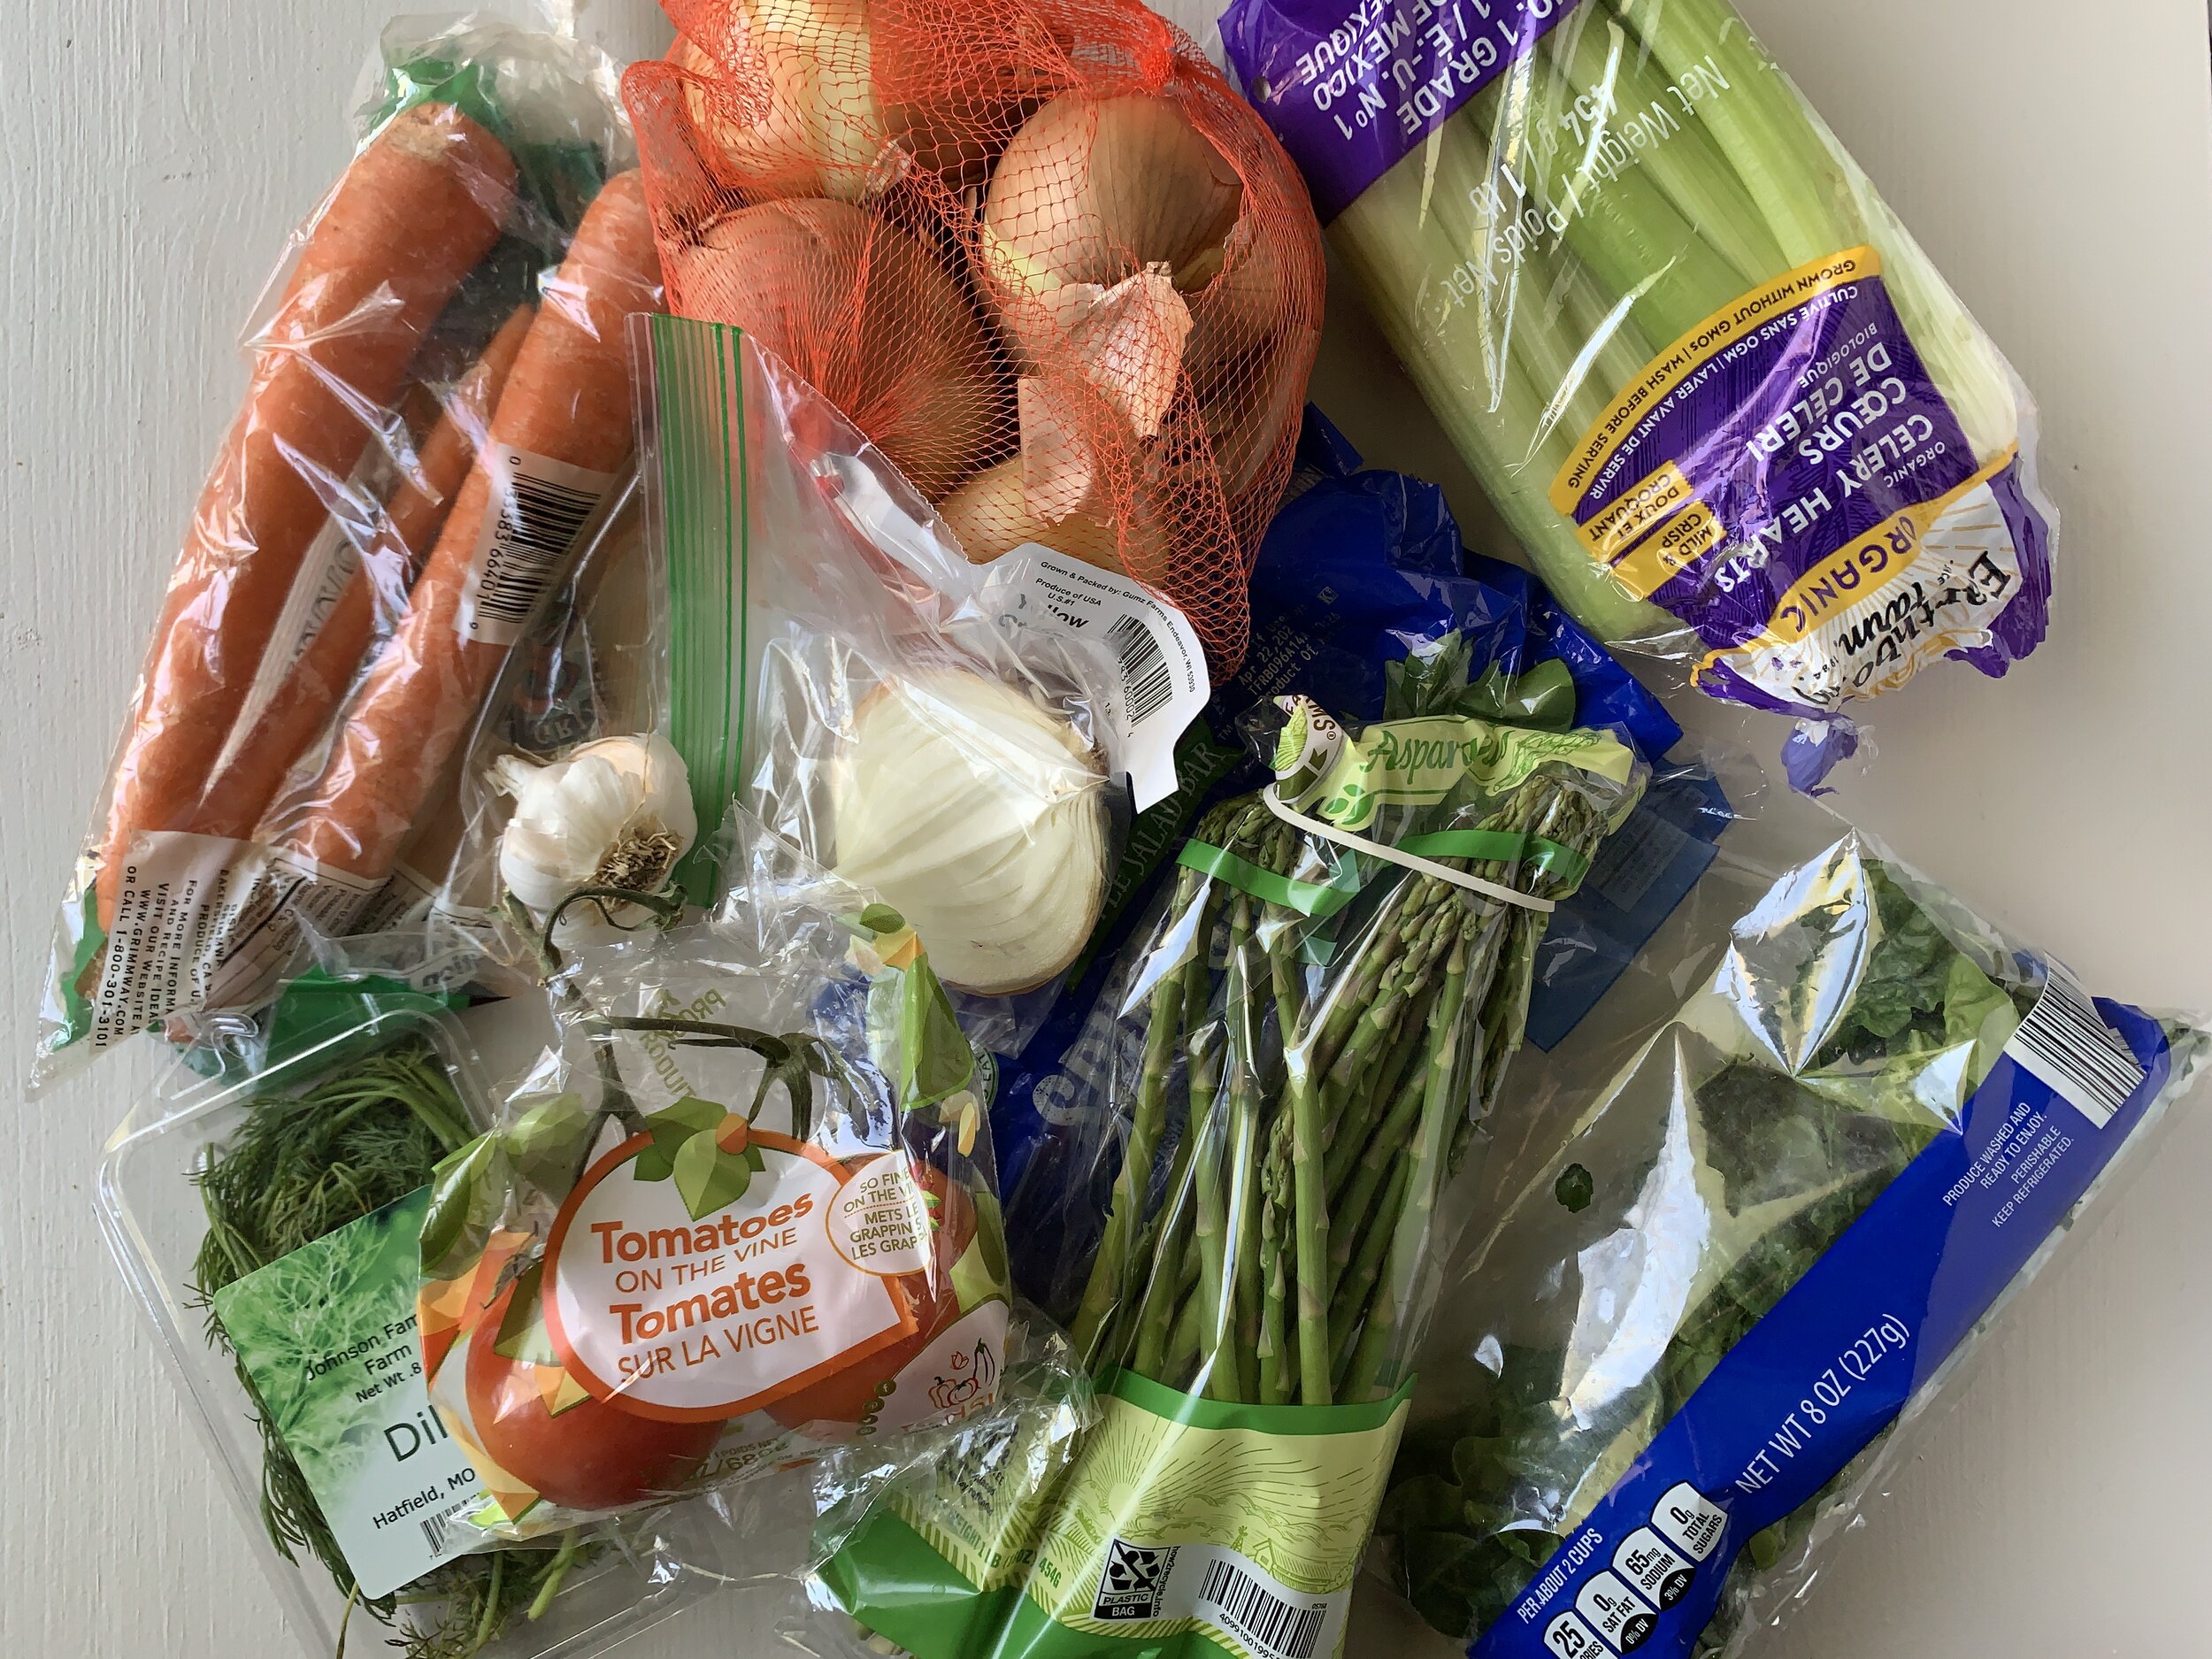
I love how flexible this recipe can be. While the ingredient list can look a bit overwhelming, it really only consists of three parts (four if you count the water): broth base, vegetable scraps, and seasonings.
The veggie broth base is pretty simple: onions, carrots, celery, and garlic. You can also add or substitute parsnips, leeks, or shallots.
Vegetable scraps are what allows this recipe to give new life to old veggies. Anything is fair game, except for the following: beets, Bok Choy, broccoli, cabbage, collard greens, kale, kohlrabi, hot peppers, rutabaga, turnips, and starchy vegetables like potatoes, corn, pumpkin, or squash.
And finally, adjusting the seasoning blend can let you make this recipe your own. I provided some ideas in the recipe below, but you can also check out this food herb and spice chart from PennState Extension.
Ready to get started?
Step 1: Wash your hands with soap and warm water. Gather your ingredients:
1 gallon water (16 cups)
3 onions, quartered
4 celery stalks, cut into thirds
4 carrots, peeled and cut into thirds
4 garlic cloves, peeled and cut into halves
2-3 cups vegetable scraps (such as):
1 tomato, quartered and seeded
2 handfuls spinach leaves
8 small asparagus stalks
3 sprigs fresh dill
Dried seasonings to compliment any fresh herbs (such as):
¼ teaspoon dried basil
¼ teaspoon dried parsley
Salt and pepper, to taste

Step 2a: Fill the bottom part of a steamer pot set with water.
Step 2b: Gather your veggie scraps. Check your refrigerator for any vegetables that are past their prime but not yet moldy. You can also collect veggie scraps in a plastic bag in the freezer and store until you are ready to make broth. This is a great way to use carrot peels and tops, greens, onion ends, etc. Make sure to double check the list of veggies that should not be included in a broth!
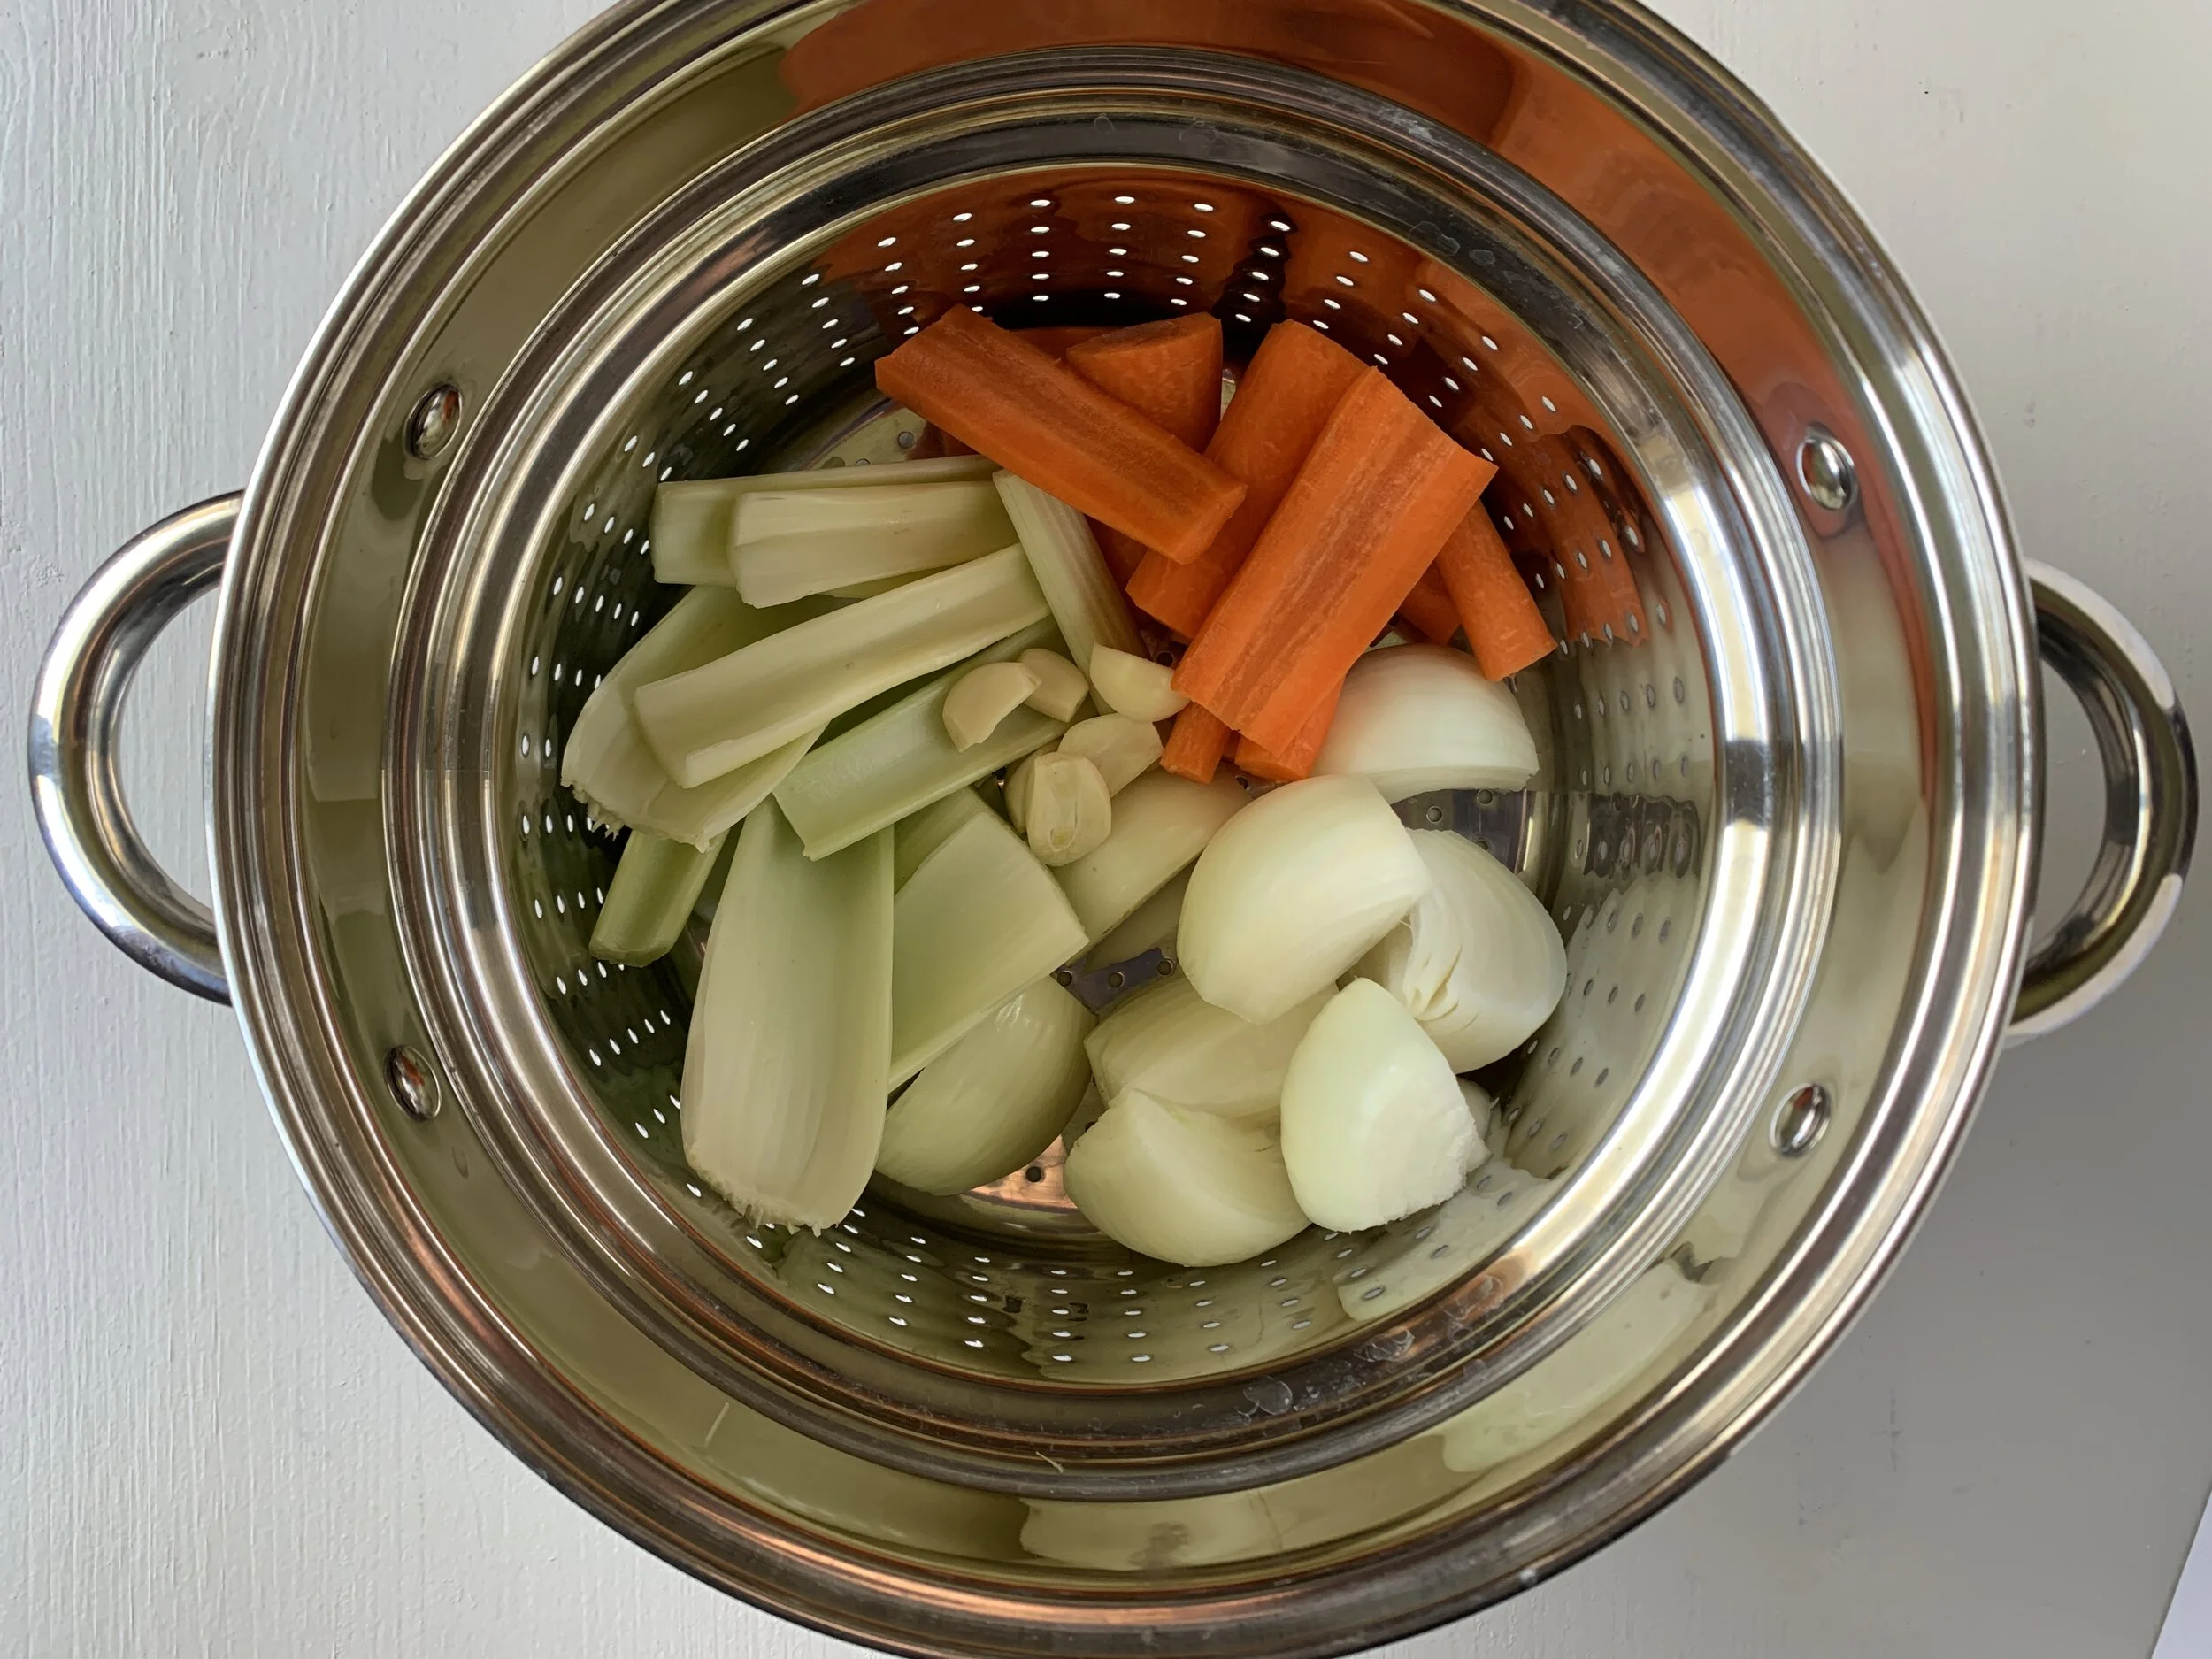
Step 3: Wash all fresh produce prior to chopping. Add broth base (onions, carrots, celery, and garlic) to the top half of the steamer pot set. Other veggies that can be included or subbed into the base include parsnips, leeks, or shallots.

Step 4: Add vegetable scraps and dried seasonings to steamer pot.

Step 5: Gently place the top half of steamer pot into the bottom part. Add additional water as needed to cover ingredients by at least two inches.
Step 6: Cover and bring to a boil. Reduce heat and simmer for 2-3 hours.

Step 7: Carefully remove top half of steamer pot from the veggie broth.
Step 8a: Place bottom pot in an ice bath for 15 minutes to cool. (I made an ice bath by filling my sink with ice cubes and cold water. A better idea would be to use a bowl or deep tray that your steamer pot can fit inside.)

Step 8b: Use a skimmer to strain any additional seasonings.
Step 9: Store broth in airtight container in the refrigerator for up to 3 days.

To freeze:
Allow broth to cool and place in freezer bag or food saver pouch. Carefully remove air from freezer bag before sealing or use a food saver vacuum. A glass freezer-safe container can also be used if the broth has completely cooled before freezing.
Tip: Divide broth into 1, 2, or 4 cup portion sizes. Use smaller freezer bags for smaller portions. Insert sandwich-sized bags inside coffee mugs and use a ladle to help prevent spills.
